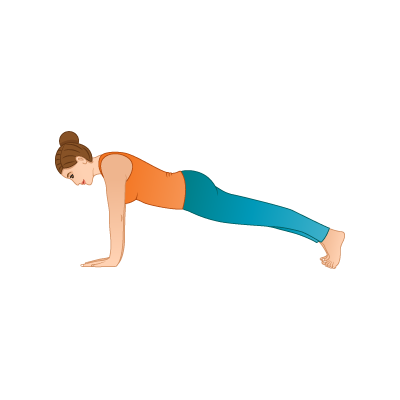
Plank Pose
Phalahakasana
STEPS
Begin from hands and knees. Line up the palms just slightly wider than shoulder distance apart and spread the fingers wide on the mat, the index finger turns to face forward. Press down into the hands and step the legs back to straight. Firm the body from the legs all the way up the torso, keeping energy right out to the top of the head. See Technical comments for more details.
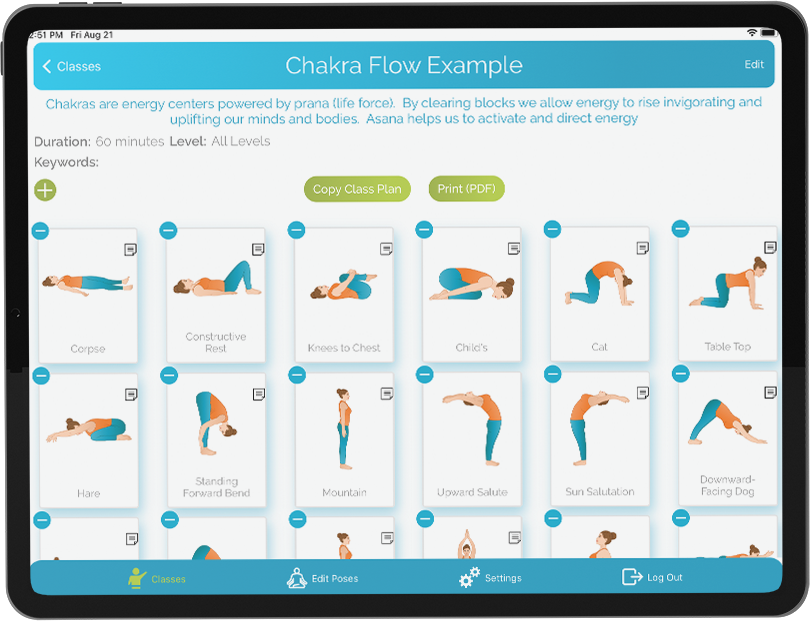
This posture can be used as part of a flow through sun salutations or held on its own for several breaths. To come out, lower the knees down to the floor again or press back to Down Dog or lower through Chaturanga Dandasana to release to the floor.
TEACHER QUEUES
VISUALIZATION COMMENTS
Plank pose is such a foundational posture in yoga, but is often overlooked. It is a great place to build strength and find alignment in the body before flowing into other more challenging positions such as Upward Facing Dog and Chaturanga Dandasana. The trick is to find buoyancy in the body as you balance on toes and hands. The technical comments below will make it easier to find this sense of buoyancy or lightness. When you find this grace in the plank pose it is a great posture to feel the intrinsic strength in the body and to enjoy it’s heating properties.
TECHNICAL COMMENTS
As mentioned above, alignment is everything for finding freedom in this posture. Start with the hands as the first point of foundation. Bring awareness to the palms, and keep the tips of the fingers and the knuckles at the base of the finger joints pressing firmly into the ground. Especially notice the base of the index finger and keep it pressing into the ground. This will help to dome up the hands and engage the muscles in the forearms. Next take attention to the shoulders and elbows. Rotate the shoulders externally and bring the shoulder blades onto the back. As you do this the eye of the elbow or inner part of the elbow will begin to rotate towards the front of the room and the pointy part will spin back to face slightly towards the toes. Next step the legs back into a full extension. Line the toes and heels up with each other, press the hamstrings to the ceiling and firm the front of the thighs. This will give lightness to the body and take some of the work out of the upper body. Bring the pelvis into align. The front of the hip bones (the ASIS) should be in the same horizontal plane as the bottom of the pubic bone. To do this, firm the lower abdomen and think of narrowing the front of the pelvis. Watch for the gluteals doing the work here. The buttocks will be firm but it is not the primary source of support for this posture and is often misused in place of the abdominals. Create continuity through the torso by keeping a connection around the entire circumference of the body between the top of the hipbones and the bottom of the ribcage. Here is where we start to find the buoyancy of the body. Keep the head in alignment, the chin is perpendicular to the floor, the back of the neck is lengthened and the eyes are looking out about a foot in front of the hands. Now lift up and out of the wrists and flower the chest forward, energize the whole body and float in this posture!
BENEFIT COMMENTS
- Strengthens throughout the body: legs, core, back, shoulders, arms, hands and neck.
- Powerful and invigorating
- Lengthens the spine
- Builds endurance
WATCH OUT FOR
- Sagging in the pelvis and lower back- an anterior pelvic tilt (pelvis tipping forward) or pelvis lifted too high and tucking under into a posterior pelvic tilt.
- Ribs popping
- Rounded thoracic- overusing pectorals
- Elbows locked and weight in wrists
- Head out of alignment- lifting the chin up or dropping the head down
CONTRAINDICATIONS
- Avoid if experiencing carpel tunnel syndrome and use caution with wrist and shoulder problems
- Use caution with lower back injuries- make sure they can keep their pelvis neutral
MODIFICATIONS
- Perform with the knees on the ground for more support for abdominals and upper body
- Perform on elbows or fingertips
- Roll the edge of the mat or use a wedge under the palms to decrease the angle of the wrist extension.
VARIATIONS
Eka Pada Kumbhakasana – One legged Plank Pose- Lift one leg off and keep it elevated as you breath and hold the pose. Repeat on the other side
YOGA COUNTER POSES
- Downward Facing Dog– Adho Mukha Svanasana
- Upward Facing Dog – Urdhva Mukha Svanasana
- Cat Pose – Marjaryasana
- Child’s Pose – Balasana
Written By: Meghan Aris
Certified in several disciplines of yoga, a pilates teacher and teacher trainer, Meghan is continually widening her path of body/mind studies. At a young age she began her journey into body movement through dance. After being diagnosed with Rheumatoid Arthritis, she shifted her practice to more rehabilitative yoga. In this discipline she found not only the resources to heal her body, but also a guide to living a life full of peace and joy. She can be found teaching on any given day at Fix Health Care

JOIN OUR NEWSLETTER
- Class planning tips
- Pose instruction articles for teachers
- Marketing, student retention and management tips